Generate your first pdf document from Fibery
Video Tutorial
The contents of this tutorial are available as YouTube video as well. If you prefer, you can watch it here
Pre-requisites
Make sure you have connected your Fibery account to FlexiPage. Workspace url and API key are required to connect Fibery to FlexiPage. Learn more about creating api token here. Visit Settings page in FlexiPage to connect Fibery.
Space & Database Setup
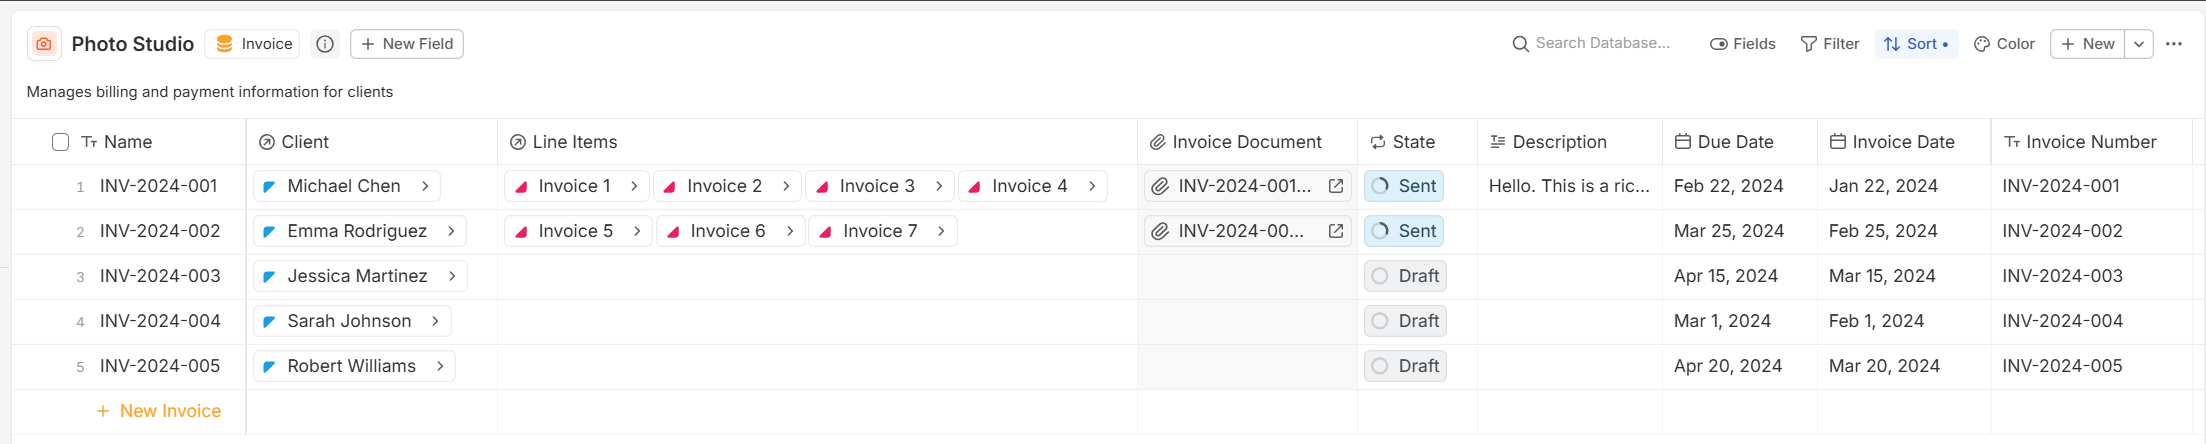
A quick overview of the Fibery setup we'll be using in this tutorial. We have Photo Studio space with Client, Equipment, Invoice, Invoice Line Items database. Our goal is to automatically create invoice documents from Invoice database entities.
Some fields of Invoice database:
- Has a
Clientfield which has a single relationship toClientdatabase entity - Has a
Line Itemsfield which links to multipleEquipmentdatabase entity - Has a
stateworkflow field which has statusesDraft,SentandPaid
Create Document Template
We have a logo, Invoice number, Client information and line items table. We'll first start with
logo. First create a new document and select the Invoice database entity.
While creating document templates, save and toggle the preview tab to see a preview of your document with fibery data
Logo
- Select the Image component from the components library by typing
/in the editor. - If you have a static logo, hover over the image and select upload button and add your image.
- For dynamic logo, select the image placeholder with left mouse click. On the right panel you will see a dropdown for field selection. Select a file field and preview to see the image.

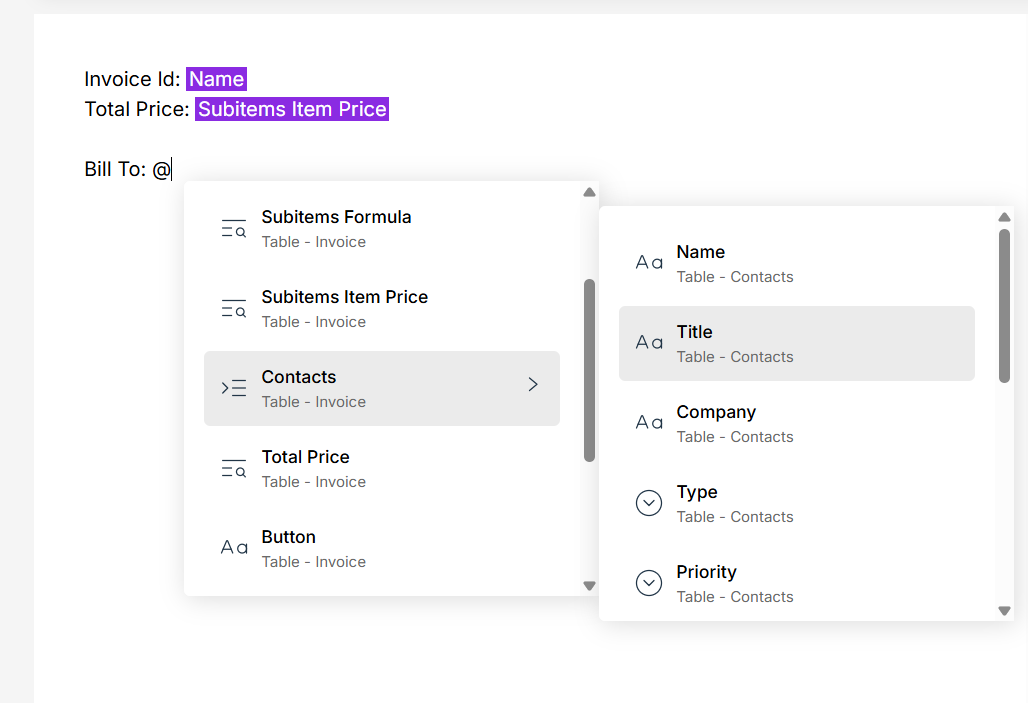
Invoice number and client information
In our Invoice database we have Invoice Number as a text field and Client as a Relation field. You can just type Invoice Number : followed by @. Once you type @ you'll see a drop-down of all the fields in the Invoice database. Type for the field name and select the Invoice Number field.
Since Client is a relation field, you will be able to access fields from the Client database itself.
If you want the information to be presented side by side, you can use our column component.
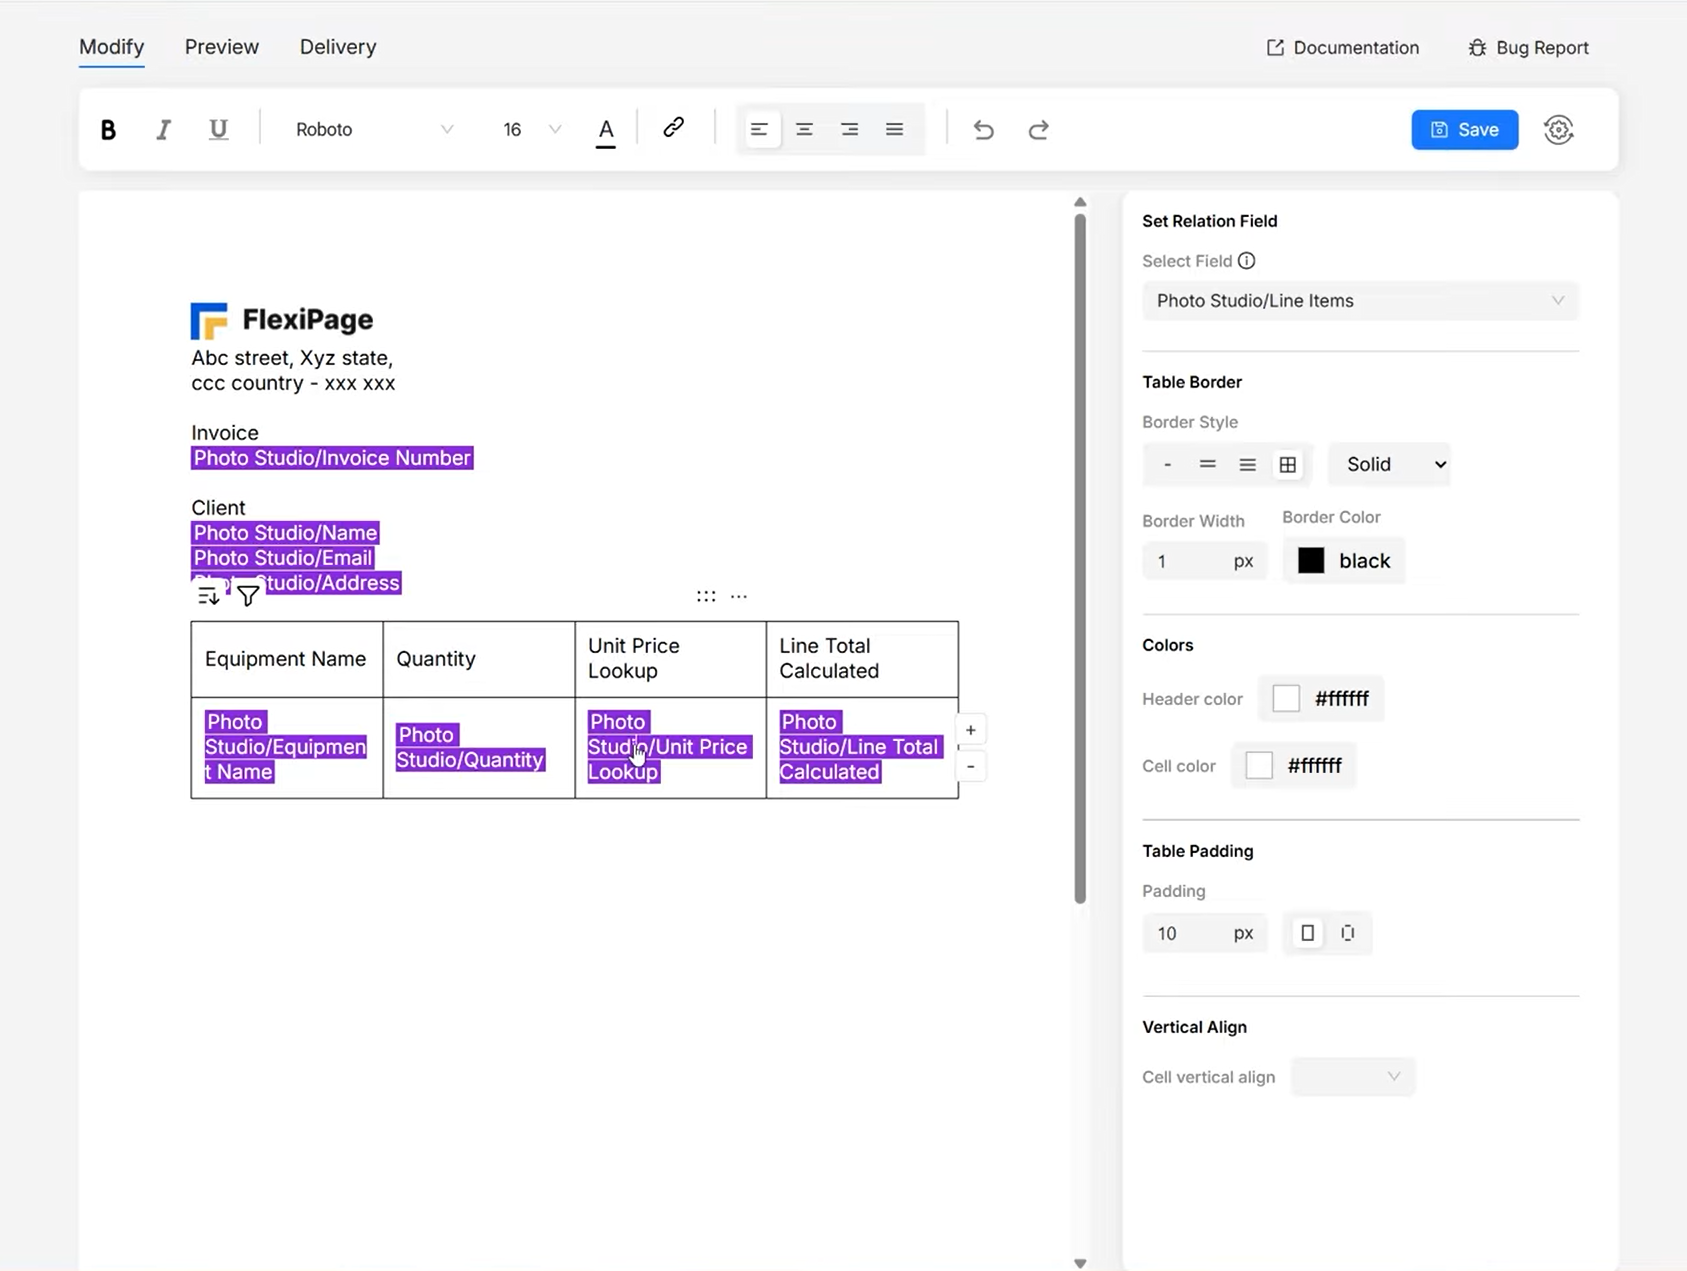
Line Items table
Quickly create a table from Invoice line items field which is a one-to-many relation field.
- Type
/in the editor and select Dynamic Table Component. - In the dialog that appears, select
Invoice Line Itemsfield and choose which fields from Line Items database you want to display in table - You can add/remove more columns by clicking on the three dots icon when hovering over the table.
You can control table styles (Borders, colors, alignment) from the right side properties panel. You can also sort and filter table rows based on field values. Check our Line Items Guide for more details.
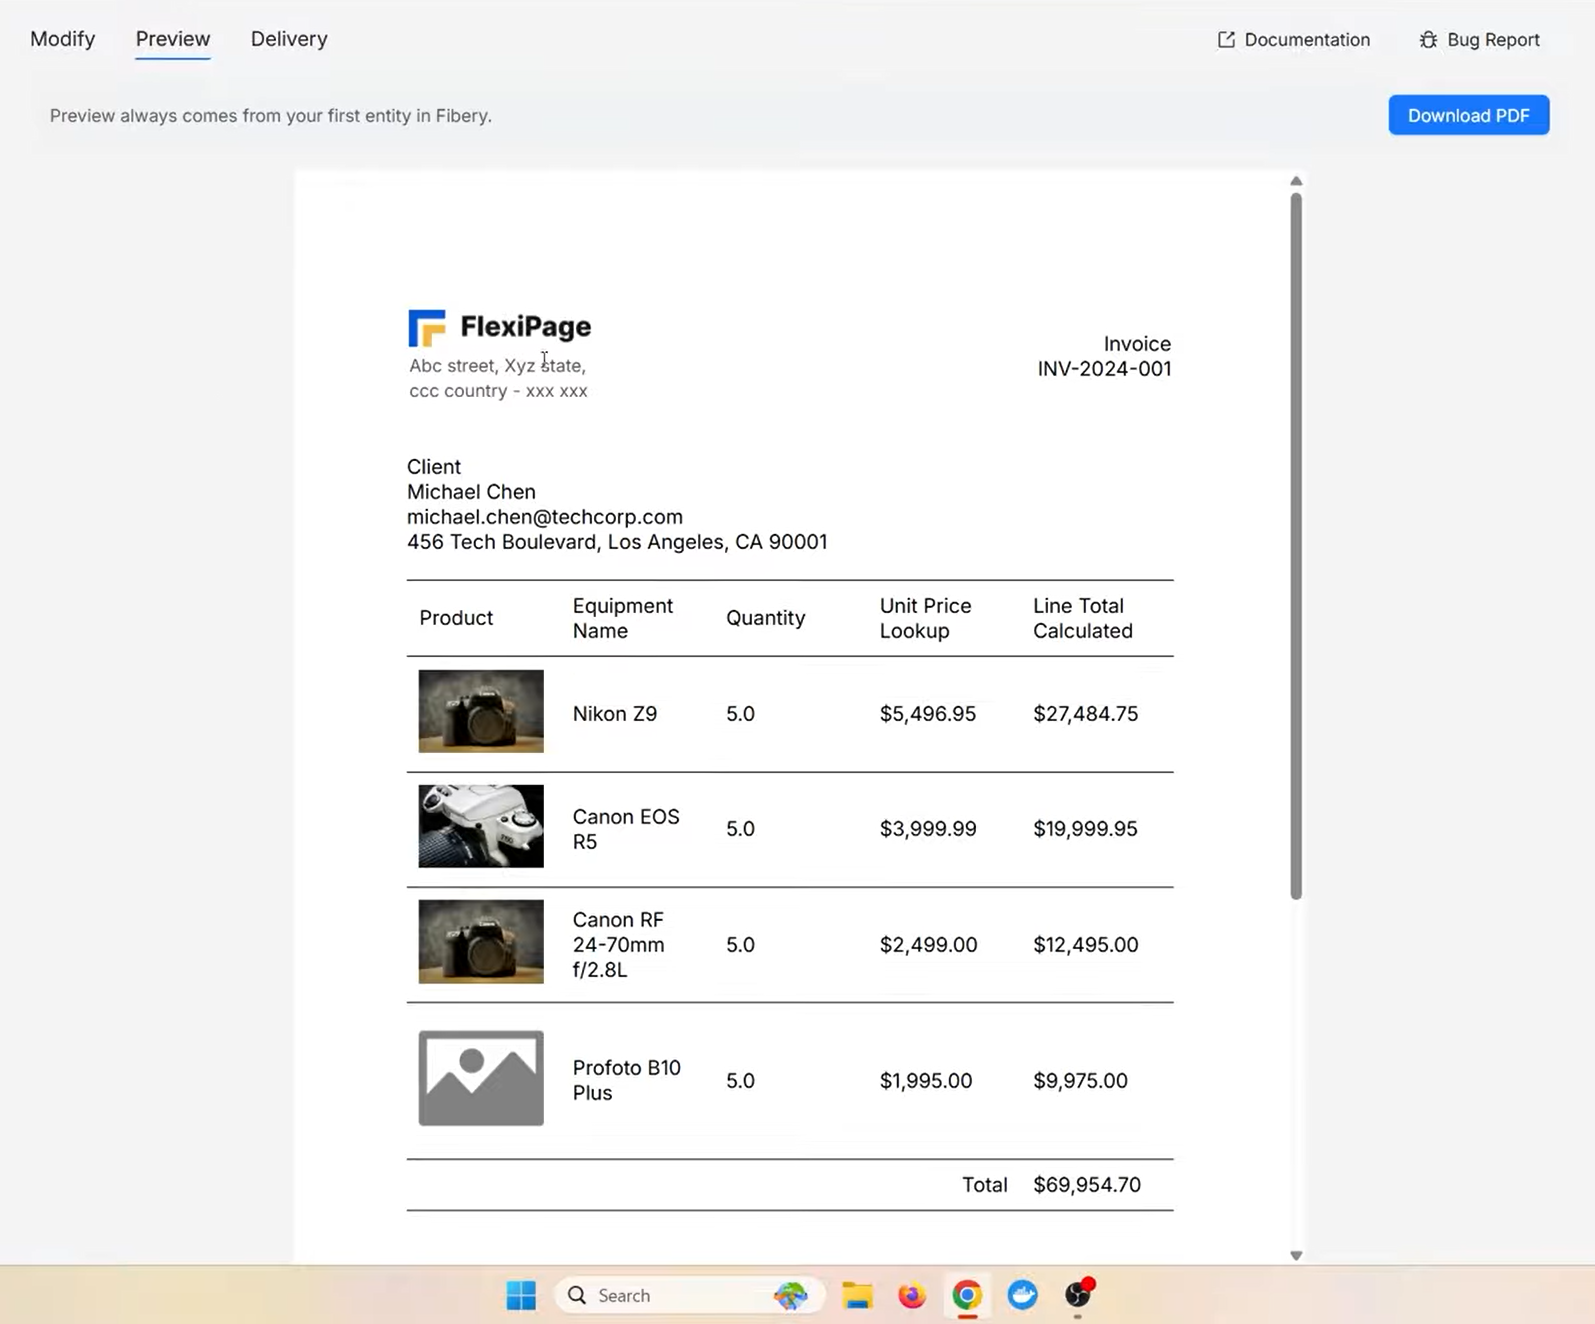
Preview Document
Preview always comes from the first entity in Fibery database. In our case, Invoice. Click the preview tab to see the merged document.
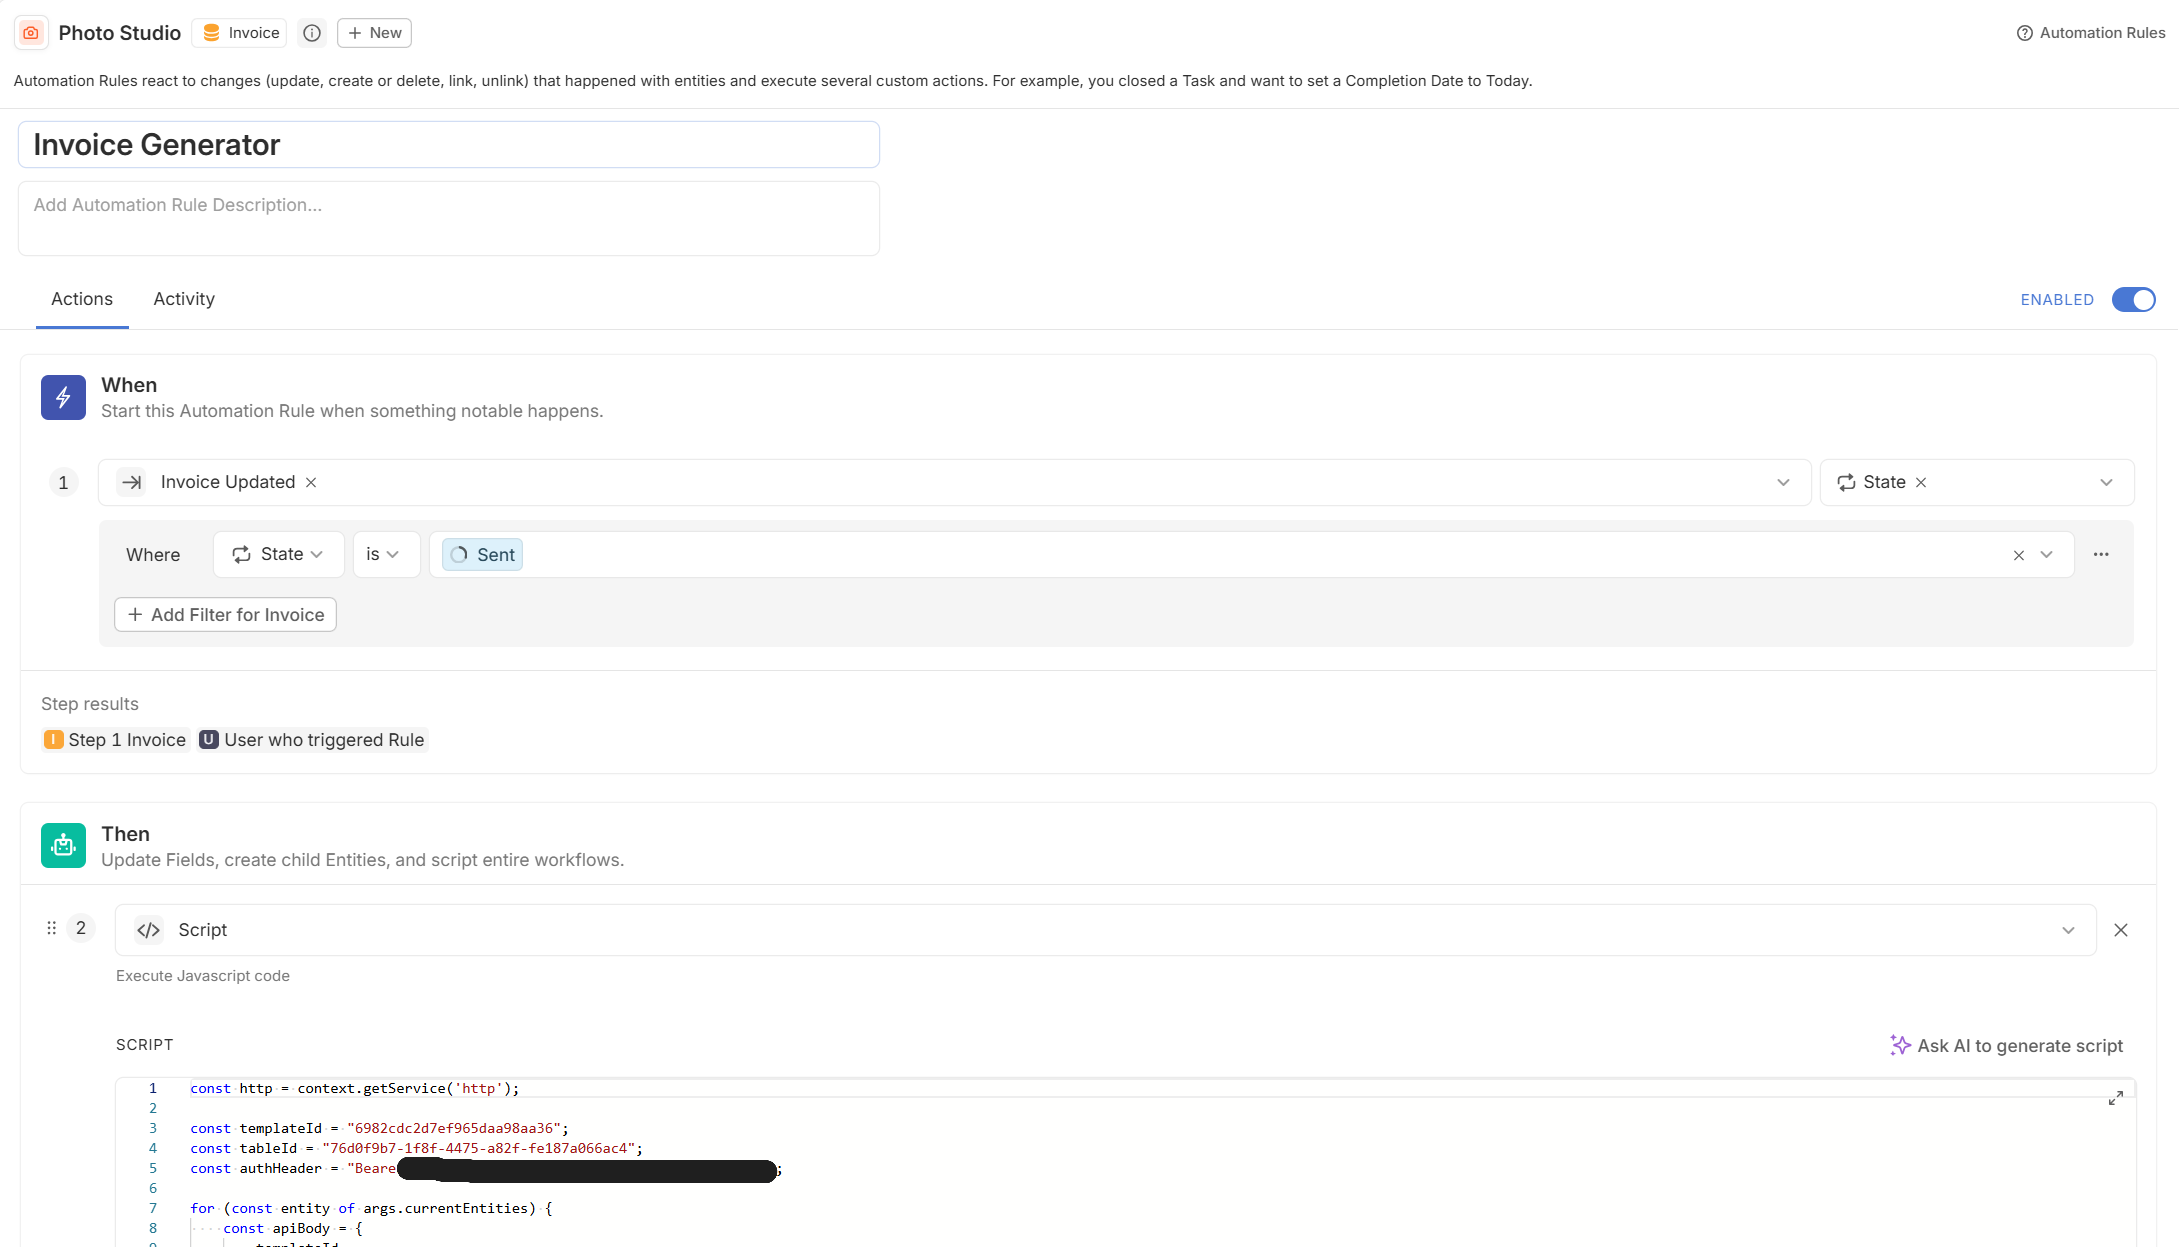
Setup Automation
Save the document.
- First add delivery option to the document. Click on
Deliverytab and selectUpload to attachment fieldoption. Choose a file field and save. - Next, in the document editor, click on the
Automation Instructions Iconwhich is located after the save button. Copy the automation code. - In Fibery, go to the
Invoicedatabase and add a new automation rule. SelectInvoice Updatedtrigger, fields to monitor asstateand add a filter to checkstateis insentstate. Whenever an invoice status is changed tosent, the automation rule will run. - In the action section, select
Scriptoption and paste the automation code. Click onSave Automation Rulebutton. - Now whenever an invoice state is changed to
sent, the document will be automatically generated and uploaded to the file field specified in the delivery option.