Airtable Automation Setup
Now that we have our document template ready, let's see how we can automate it whenever a record gets created in Airtable and store the resulting document in an Attachment field.
Video
The contents of this tutorial are in video format as well. You can watch it from here
Automation Script
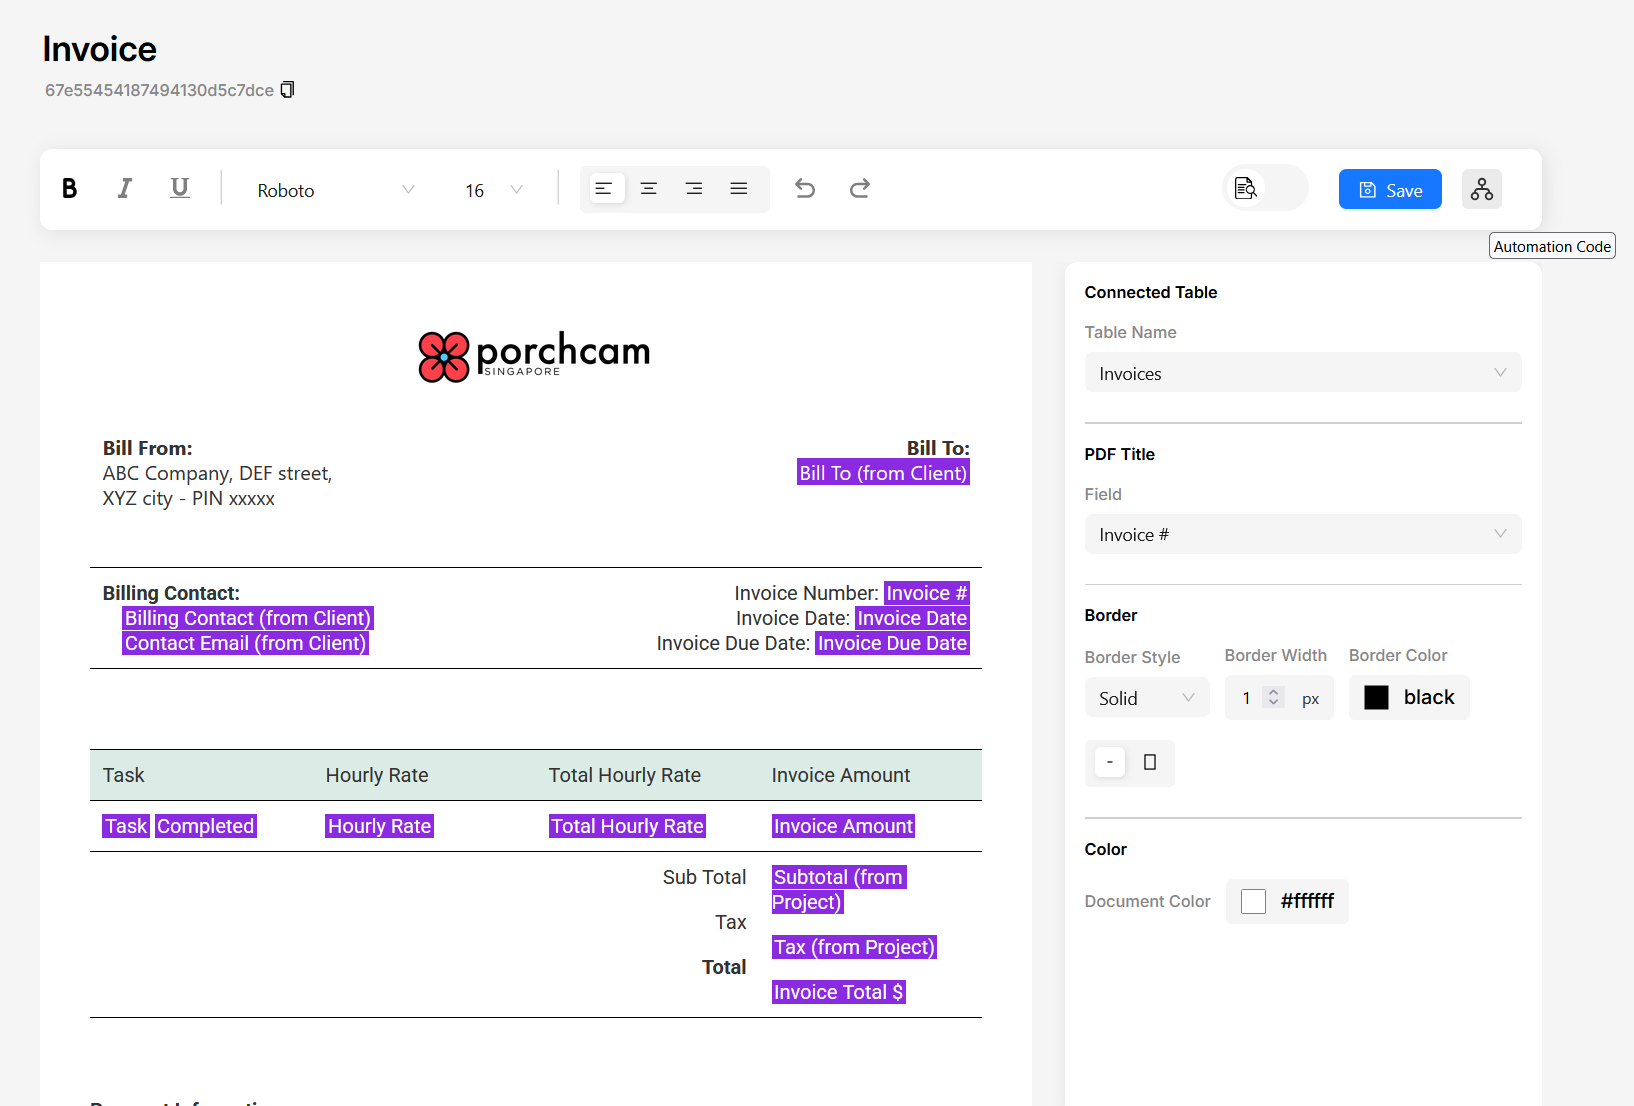
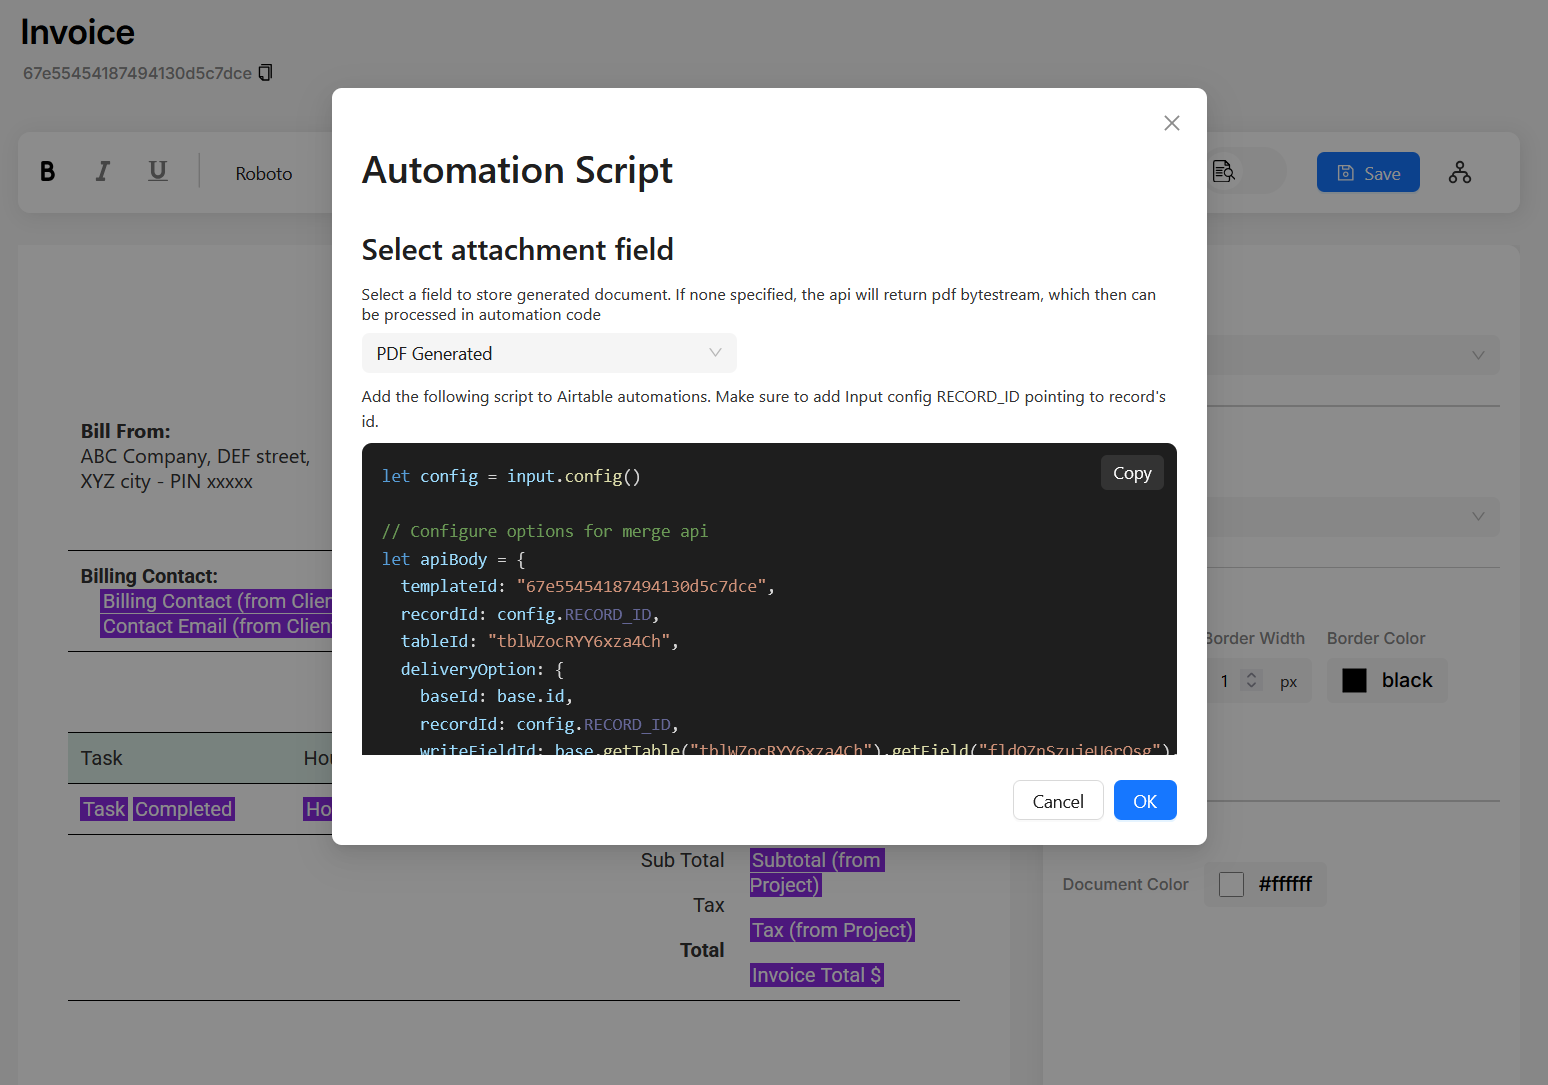
Open the document template in editor and click on the Automation code icon in the toolbar (the right most button, after save). It will open Automation Script popup. Select the attachment field you want in the dropdown and copy the code shown in the popup.
Setup Airtable Automation
- Open the automations tab in the desired base and create a new automation.
- In this example I'm setting the trigger as "When record gets created".
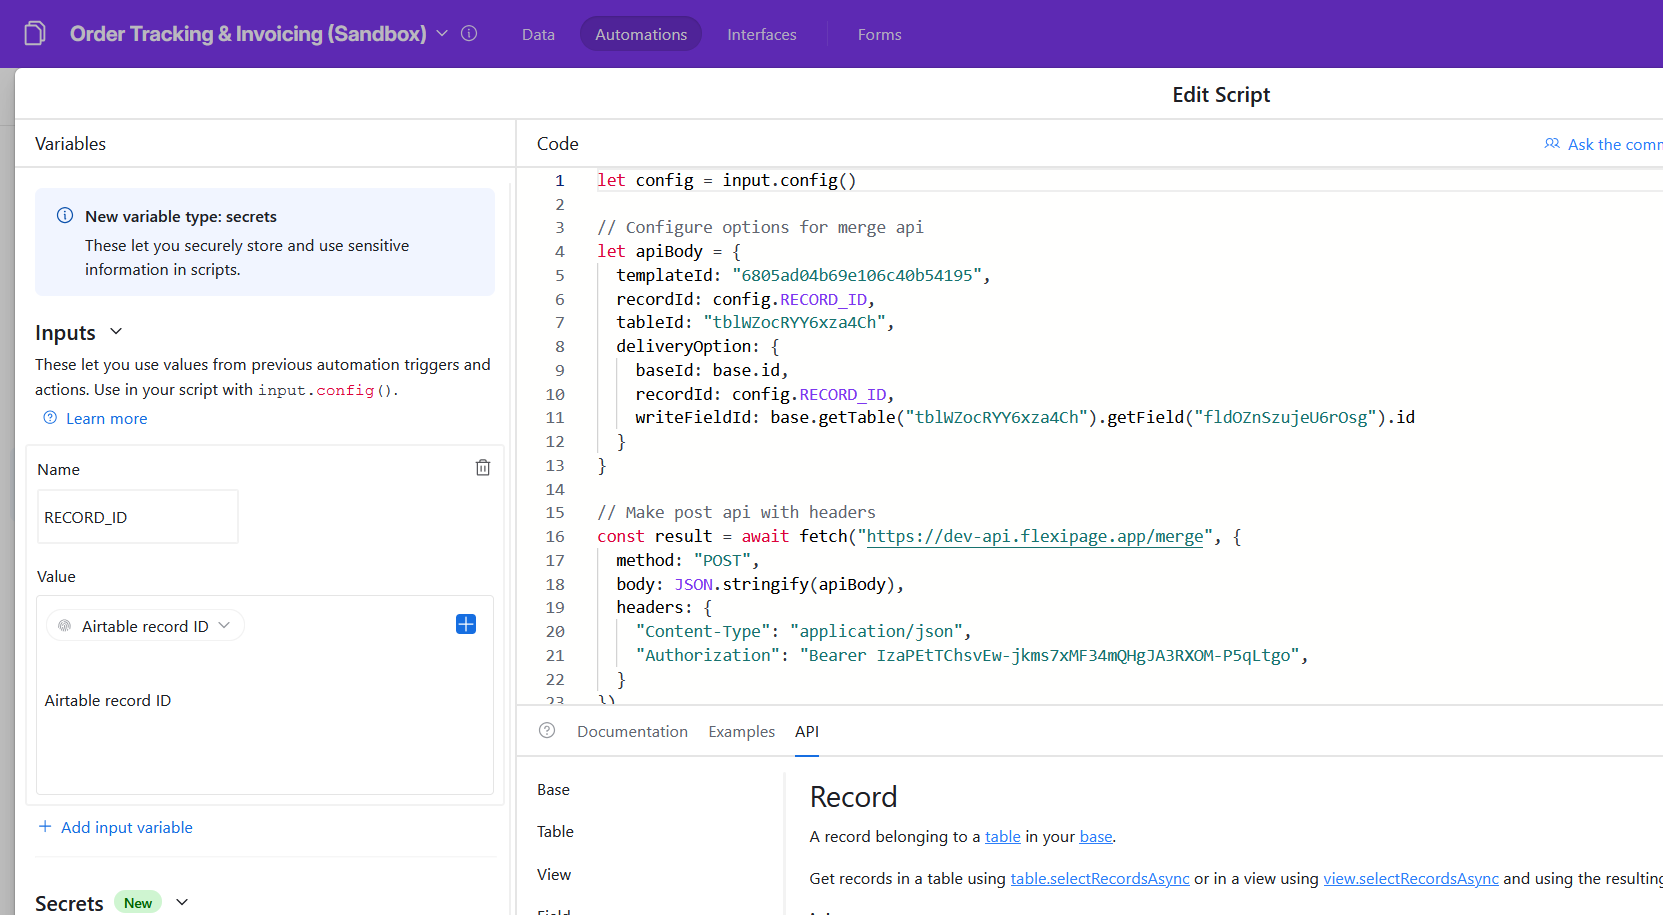
- Add a "Run Script" action after this trigger and paste the code you copied from the Automation Script popup
- Add input variable with name as "RECORD_ID" and choose value as data from record created "Airtable record id"
Click on "Finish Editing" and test your automation. You will see that the generated pdf will get stored in the selected Attachment field.
Draft mode
Draft mode allows you to modify the document after merging it with an Airtable record. To setup draft button:
Button field in Table
- In the document editor, click on the Automation Instructions icon and select the Draft button.
- Copy the URL formula.
- In Airtable, create a new button field and paste the URL formula.
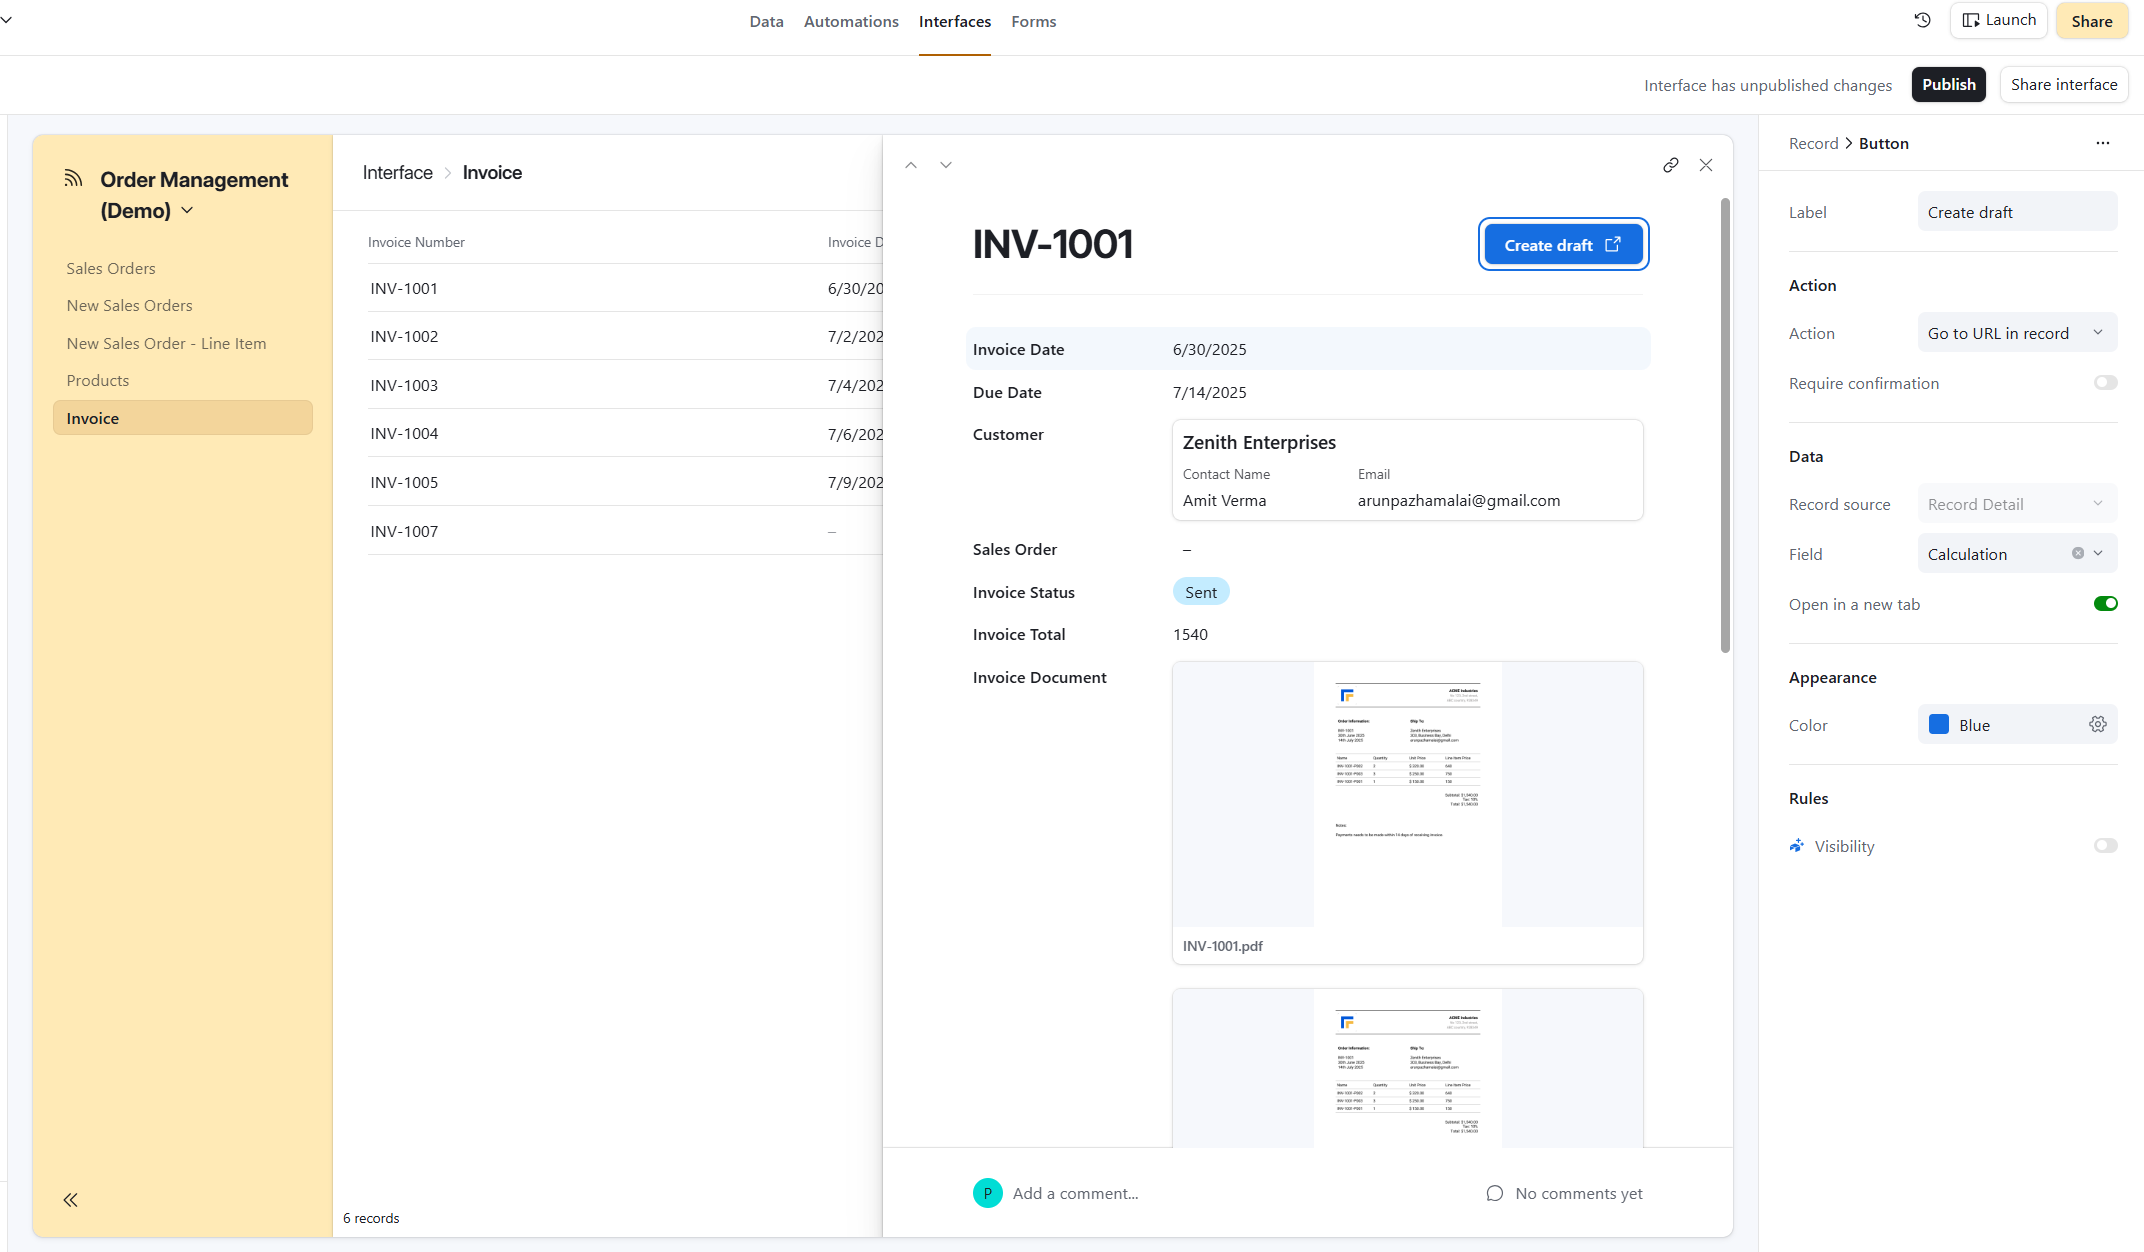
Button in Airtable Interface
Airtable interface buttons cannot have formulas. But it can be linked with a URL field.
- Create a new URL field in the table and paste the URL formula.
- In the Airtable interface, create a new button.
- Set it with "Go to the URL in record" action and select the URL field.