Tables
Use a table to lay out information in rows and columns, such as an order summary or a list of specifications. This guide covers how to build and edit a basic table.
To dynamically populate line items from linked records, see the Line items guide or Looper.
Type / in the editor and choose Table. A starter table with 2 rows and 3 columns is added. Click any cell to type, or type @ inside a cell to insert a field from your record.
Add or delete columns
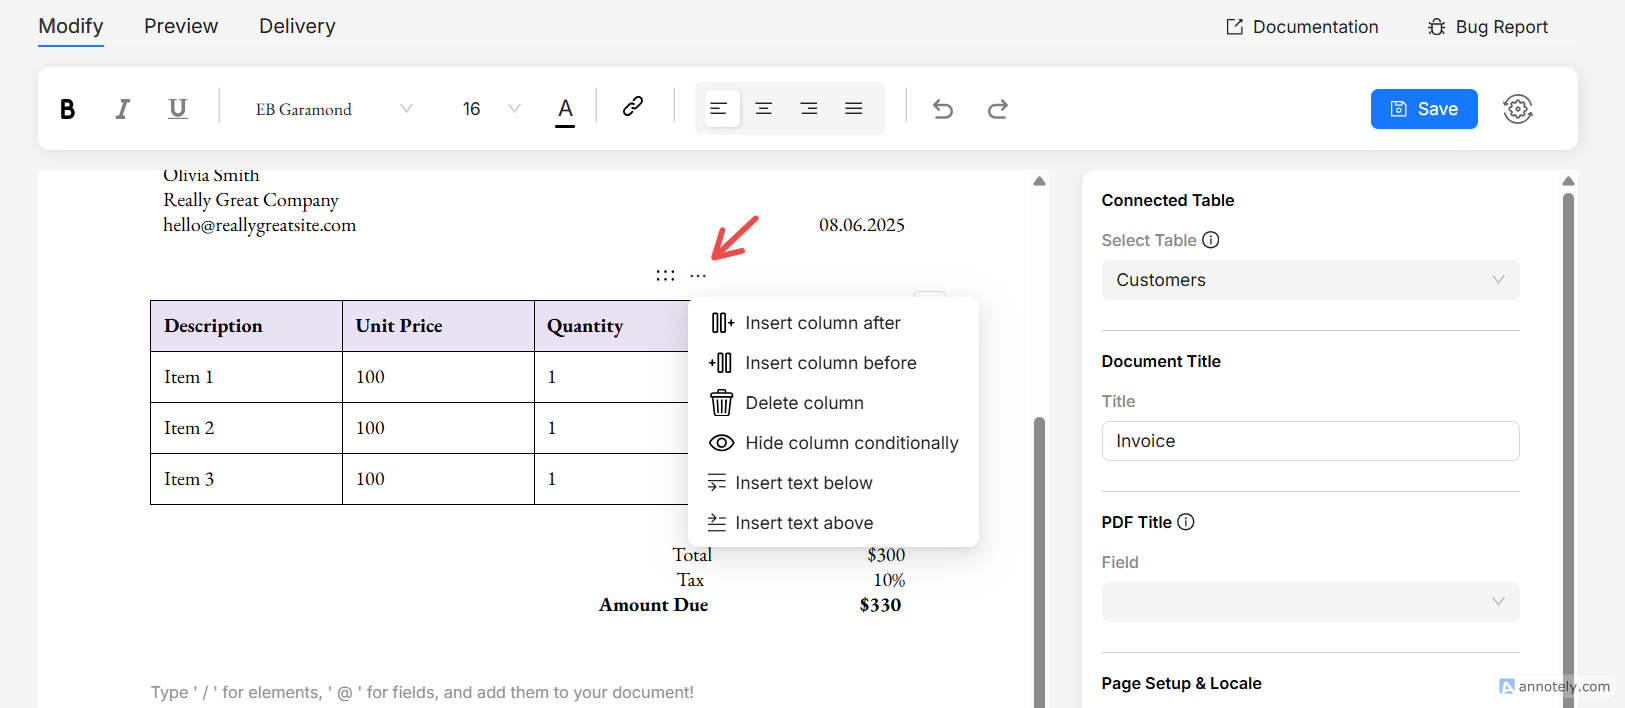
Hover over the table. A small toolbar appears at the top of the column you are pointing at. Click the ⋯ (more) icon to open the column menu:
- Insert column before: adds a column to the left.
- Insert column after: adds a column to the right.
- Delete column: removes the current column.
To move a column, use the drag handle next to the ⋯ icon and drag the column left or right.
Add or delete rows
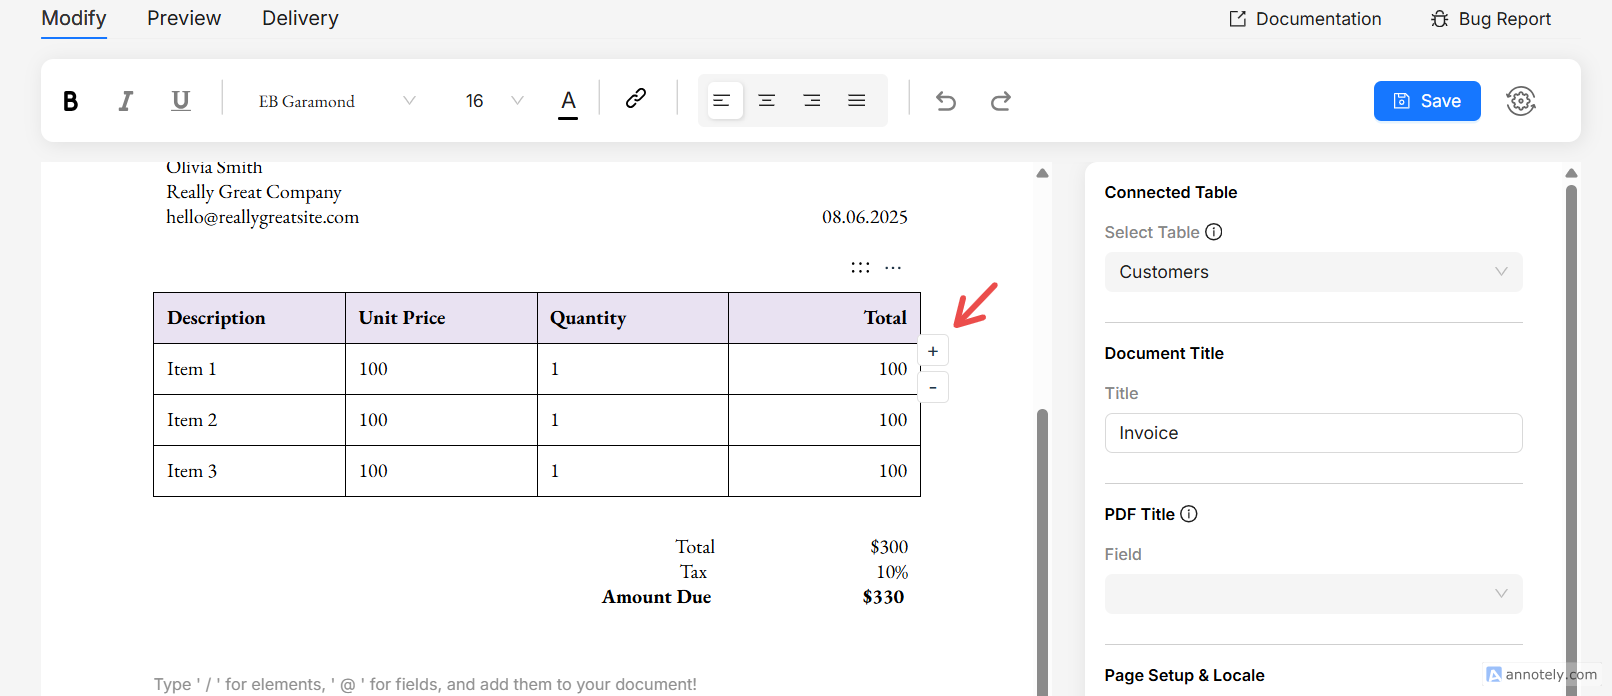
Hover over the table. Two small buttons appear to the left of the row you are pointing at:
- The + button adds a new row below.
- The − (minus) button deletes the current row.
Resize and style
- Resize a column: drag the border between two columns to change its width.
- Style the table: select any part of the table, then use the Properties panel on the right to change borders, colors, alignment, and padding. Text color and font are set from the toolbar.
If your table is the last thing in the document and you cannot click below it to type, open the column ⋯ menu and choose Insert text below. This adds a line right after the table.